Available 7 Days A Week - No Weekend Surcharge

Leak Detection

vlogs

NEED A PLUMBER? WE’RE IN YOUR TERRITORY!

Leak Detection

Hello everyone it’s Richard at Plumbdog here.

I’m out of the property in Baldivis, Western Australia and I’m in a customer’s bathroom. He has lived here about a year and since he’s moved in he’s noticed all sorts of issues with the moisture around the shower. 

You can see behind me there’s moisture coming through somewhere behind the shower screen here sort of adjacent to the shower taps. 

The shower outlet is up there. So, about a year ago he had the shower regrouted because it was noticeably poor with the grout, so the grout guys came and sort of ripped that out and revamped it but he’s still got moisture problems. The client said he had a plumber out last week who looked at the taps and resurfaced them and just sort of put them back and couldn’t really explain too much so he’s got us out for leak detection.

The first thing I want to do is test the water meter at the water main coming in and I just want to look at the small needle on here and see if there’s any movement so I’m doing a five minute test and see if that needle moves at all.

During a test on the water meter here, I noticed that the needle is moving but it’s moving really really slowly and it’s losing about one litre every four to five minutes, so there is a leak on the main but because that’s inside and it’s just showing signs of sort of damp and moisture inside,  I’m pretty sure there’s not a litre of water lost every four to five minutes inside the house because as you can expect it’d be a swimming pool in there so there is a leak on here somewhere but I don’t think that’s it, so what I’m going to do is, I can see that the reticulation connection is just there, the master valve and the master solenoid. I’m just going to isolate them and then just re-test just to see if that makes any difference.

I’m retesting now and now I’ve isolated the retic and there’s no movement, no movement whatsoever over five minutes so we’re not losing any water which is a good sign but I was hoping to find a little bit of loss somewhere because we know that there’s signs of moisture inside so if it’s not on the water main then it’s not anywhere in the pipe work to the taps.

The next thing to do is to test from the taps to the shower rose because that’s the next place where there could be leaks so we’re going to do a pressure test but the water meters are no longer moving when nothing’s been used in the house. Behind the shower here in the bedroom cupboard you can see the plaster is really flaky directly behind the shower taps. I’m removing the shower rose so that we can get the threaded outlet there in order to test using the pressure gauge.

I’m tightening on the flexi hose to the pressure gauge there, just making it watertight in order for us to test. I opened up the taps in no particular order, a hot one first in this case. Once they’re opened and pressurised close them back up so now we’ll perform a test between the shower taps and the outlet. I’m carrying out this test over five minutes to make sure there’s no drop and in this case there is no drop so there is no leak between the taps and the shower outlet.

I’m just turning off the water main opening the taps back up and leaving them open, observing the pressure and now over five minutes we are testing all the way back from the shower rose, all the way back to the main stop tap. Again, there is no pressure loss detected so there is no leak on the main supply pipe all the way back to the meter. We’ll just open up the main again so the water’s back on. The test is completed so I remove the pressure gauge and release the pressure there,  using thread tape on the thread there and then reattaching the shower rose.

It’s important here, once it’s back on to test for leaks because if there’s any leaks guess where it’s going to go? It’s going to go behind the tiles and make the situation worse. Okay, so the silicon around the spindles there, this should have been done by the previous plumber because when the shower is in use the water can get behind those flanges and behind the tiles. I’m also spraying with soapy water to get rid of that excess silicon and wipe away and as you can see my spray bottle has seen better days – time for a new one.

So that’s my test complete. I’ve done the main test on the meter, got a pressure test on  the shower breach, and I’ve checked the taps. They were previously serviced last week. I think that plumber has actually solved the issue. I think the taps were leaking and they are quite old and I would’ve recommended replacing them so he has serviced them and put them all back together.

I do think that solved the problem but as you saw he hadn’t actually siliconed around the spindles there so with the shower in use, water would have got behind there and made the problem just as bad again. so that’s been done. Some recommendations to the client, or what I think he should do, I think they need to peel off some of that plaster get back to the brick and let it dry and it should dry before they sort of spend any more money on regrouting and what have you and then they can give us a shout if they’ve got continual problems but there’s no leaks on the water main with the retic isolated,  there’s no leaks on the pipe work between the taps and the shower rose, so that’s all good.


The grouting and ceiling looks good so I think he’s good to go.  I think the problem has been solved. Thank you for watching – I hope you learned something and we look forward to seeing you on the next video.

Take care guys, see you later!

Hot Water System

Hi everybody, it’s Richard at Plumbdog, so I’ve just come out to a property where the customers just brought me around the back of the house. He’s showing me his hot water system and he’s asked me to come out here and service it. He seems to think it’s working quite hard, he can hear sort of water travelling through and he sort of thinks his water bills are a bit higher than usual.

Before I get started, if the water bills are quite high and you can hear running water this will point in me towards the fact that there might be a bit of a water leak instead of an actual system fault.

I’m going to go out to the front of the property and just going to check if we’re losing any water there. At the water meter, I’m just going to perform a five-minute test and see if it’s moving at all. If the needle moves, there’s a water leak. Every full circle, every time it goes around 360 degrees that’s one litre.

It’s not moving much but it’s definitely moving. You can see that needle is moving – it’s just moving really slowly. If you blink, you’d miss it. This is the reason we do tests over five minutes.

I’m going to a see if I can figure out where that leak might be. I’ll isolate the hot water system first and see if it’s on the hotline or the cold line. I have retested as I’ve isolated the water cold feed into the hot water system to see if it made any difference and it didn’t. That means is that there is a small water leak but it’s on the cold line not the hotline.

This would mean that the job has now transitioned from hot water servicing to leak detection, which are two totally different specialized services of ours. Have a look at the video to determine the next steps utilised to resolve the leak.

Changing a Wall Mounted Mixer Tap
  • A burst pipe is often reflected by a sudden increase in your water bill.
  • Contacting a licensed plumber to detect and fix your leak will save time, money and precious water.
  • Be sure to take care of pipes and avoid damaging them when installing so as to reduce the chance of a burst pipe later on.
  • Like & Subscribe to our YouTube channel to stay up to date!

Finding the source of a leak can be both time consuming and frustrating. The mystery of what mess you could find beneath the ground may be daunting, but with Plumbdog on hand we can save you time, endless digging to find your leak and many, many litres of water. Here Darius shows us how the team uses their specialist equipment to quickly find the source of the leak and fix the problem.

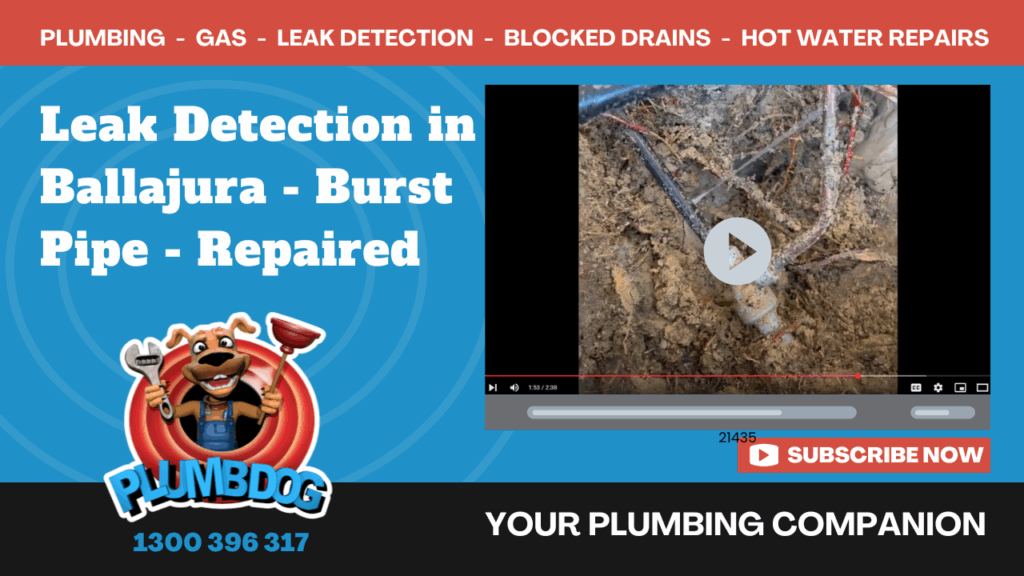
BURST PIPE
Darius arrives at a call out for a burst pipe and with some initial checks realises the problem is external to the house coming from the cold water main.

FUJI LEAK DETECTOR TIME
Like a stethoscope for leak detection, Darius uses the Fuji Leak Detector to test the area around the suspected leak. Navigating his way closer to the water metre he finds the correct spot to target his digging.

UNEARTHING THE PROBLEM
With the removal of a few pavers and a bit of digging, Darius finds the source of the water leak with damp soil near the copper pipe joining the polypropylene pipe. Turning the water main back on confirms this is the source of the leak, with water starting to gush out of the poly pipe. With a little more digging Darius reveals a number of damage points in the poly pipe that have weakened and split open.

AVOIDING THE ISSUE
The damage found was most likely caused during the installation phase of the build. The pipe was relatively new and should have lasted a lot longer, however the pipe looked as though it had been dragged and damaged, weakening the pipe. A nice reminder that taking care of your plumbing materials (like Plumbdog do!) will mean less hassles down the line.

THE SOLUTION
Darius decides the most efficient way to repair the damaged pipe is to extend the copper pipe down to where there is some undamaged poly pipe to connect to. Darius is careful to add a bend to the copper pipe extension to help relax the angle of the join to the poly pipe. Sharper angled joins are a possible contributing factor to damage and weak spots in the pipe.

Plumbdog uses specialist equipment, in this case the REMS press gun to join the copper pipe extension to the existing copper pipe. The press gun is used to crimp the sections of pipe together. A Plasson fitting is used at the other end of the copper pipe extension to connect to the existing undamaged poly pipe.
Tip: Always check that the Plasson fittings have the grab ring around the right way as sometimes they can be put in the fitting back to front.

TESTS AND CHECKS
Plumbdog takes pride in getting the job done well which is why the final checks are so important. Darius turns the mains water back on and runs the nearest tap while visually inspecting for leaks around the newly installed pipe. The water metre is also tested for a period of time to ensure that no water is being lost anywhere else.

GOT A LEAK?
Let Plumbdog play their favourite detective game!
If you’re in the Greater Perth area, invite us round to find your leak. We’ll bring our favourite gadgets and will be happy to get the problem sorted for you and save you time and precious water!

Don’t forget to check out our YouTube channel, like and subscribe to stay up to date with our latest videos.

Subscribe To Our YouTube Channel

  • High Water Bills are a good sign of a Water Leak
  • We show you how you could sniff out a leak too!
  • Like & Subscribe to our YouTube channel to stay up to date!


Our clients had high water bills and were also advised by the water corporation that they may have a water leak. Not all homes are the same and on this job, Top Dog Richard found the water leak without the need for any of our advanced leak detection equipment and he shows us why. You can even try it next time you suspect that you have a water leak.

In this VLOG Richard takes us through some steps that you can follow to start identifying and confirming whether you have a leak and where to start looking.

Ascertain if there is a water leak

Turn of all of the water in the house. Check the meter if it’s still running. If the water meter is still spinning, this indicates that there is a leak.

Plumbdog FYI: 1 revolution is 1 litre of water so if yours is spinning quickly, imagine how much water goes down the drain.

Identify Where Water Supply Feeds Property

This is a good starting place and the most logical as you can get an idea where the pipes lead to around your home.

Plumbdog Tip: If you familiarise yourself with your own home, being aware of things like where your inspection shafts and access points are can save valuable time which in turn costs money. In some properties, these have been hidden over time whether paved over or just covered with dirt and it can be a timely exercise for the plumber to locate these necessary locations.  

Check Reticulation

This isn’t always the problem area but a good place to check. At today’s property, this was the problem area and you can see with the water build up in the video. After isolating by turning the isolation valve to stop the water, the water drains away which we can then easily identify the problem area to get on with fixing.

Plumbdog Tip: Isolating The Cold Water Line.

If you’ve been following our videos, you’ll already know that you can also determine if the leak is on the cold water line or hot water line by simply turning off the water supply to the hot water system. How does this work? If you have identified that there is a leak and the needle is still spinning with the hot water line off then there’s a it’s on the cold water line.

All The Gear & Every Idea

All of our vans are fully fitted with all the gear we need for water leak detection and even tools to sort out blocked drains and all sorts of plumbing issues. Not only do we have the gear, we have every idea!

If you’re in the greater Perth area and have any plumbing issues, give us a whistle! Don’t forget to like and subscribe to our YouTube channel too! We’ve been getting some great feedback on our videos and we enjoy sharing with our customers and viewers some useful tips and some of our plumbing adventures.

Don’t forget to LIKE & SUBSCRIBE to our YouTube Channel to stay up to date with our latest videos!

Subscribe To Our YouTube Channel

Load More Vlogs
It seems we can't find what you're looking for.

Supply & Install Enquiry

Apply for a position form

Upload documents (CV and cover letter)

Contact Us