
At Plumbdog Plumbing, we always have our noses to the ground, sniffing out plumbing problems for our customers across Perth, WA. This time, our expert plumber Darius was called out to a property in Mount Lawley to investigate a suspected gas leak—and what he found was enough to make even the toughest Plumbdog wrinkle his nose!
Sniffing Out the Problem 🐾
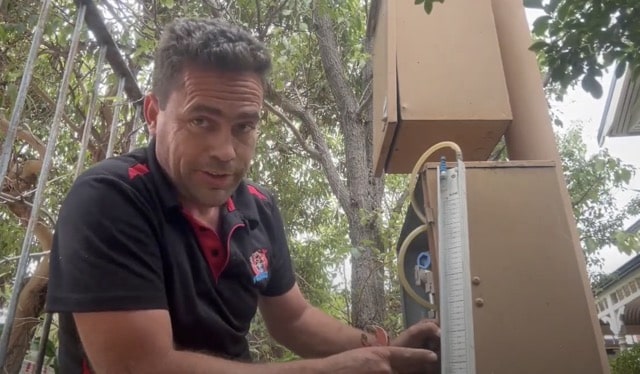
Upon arrival, Darius performed a gas test at the meter using his trusty manometer, confirming a gas leak on the property. But where was it coming from? That’s where experience and the right detection tools come in handy!
Using his 20+ years of plumbing expertise, Darius methodically traced the leak’s location—deep in the backyard. As he got closer, the stench became overwhelming. Gas leaks, especially those left unnoticed for a long time, react with the soil and create a powerful odor that lingers on clothing, skin, and even in the air for days!
The Leak is Found!
After carefully exposing the pipeline, Darius performed the good old soapy water test—a tried-and-true method to confirm leaks. Sure enough, bubbles formed around a fitting where PVC connected to copper, confirming the culprit!
Fixing the Leak & Keeping the Customer Safe
With the problem identified, Darius wasted no time:
✅ Repaired the faulty fitting
✅ Conducted a final retest to confirm no further leaks
✅ Submitted a Gas Notice of Completion Certificate, ensuring the property was safe
As always, Darius backfilled and cleaned up the work area, leaving it just as he found it—only safer! With a big smile and a satisfied customer, another Plumbdog job was successfully completed.
Need a Perth Plumber Who Knows Their Stuff?
At Plumbdog Plumbing, we’re fully licensed gas fitters and always ready to track down leaks, repair issues, and ensure your property is safe.
🚰 Got a plumbing or gas problem? Give us a whistle! 🐶🔧
📞 Contact Plumbdog Plumbing Today!